
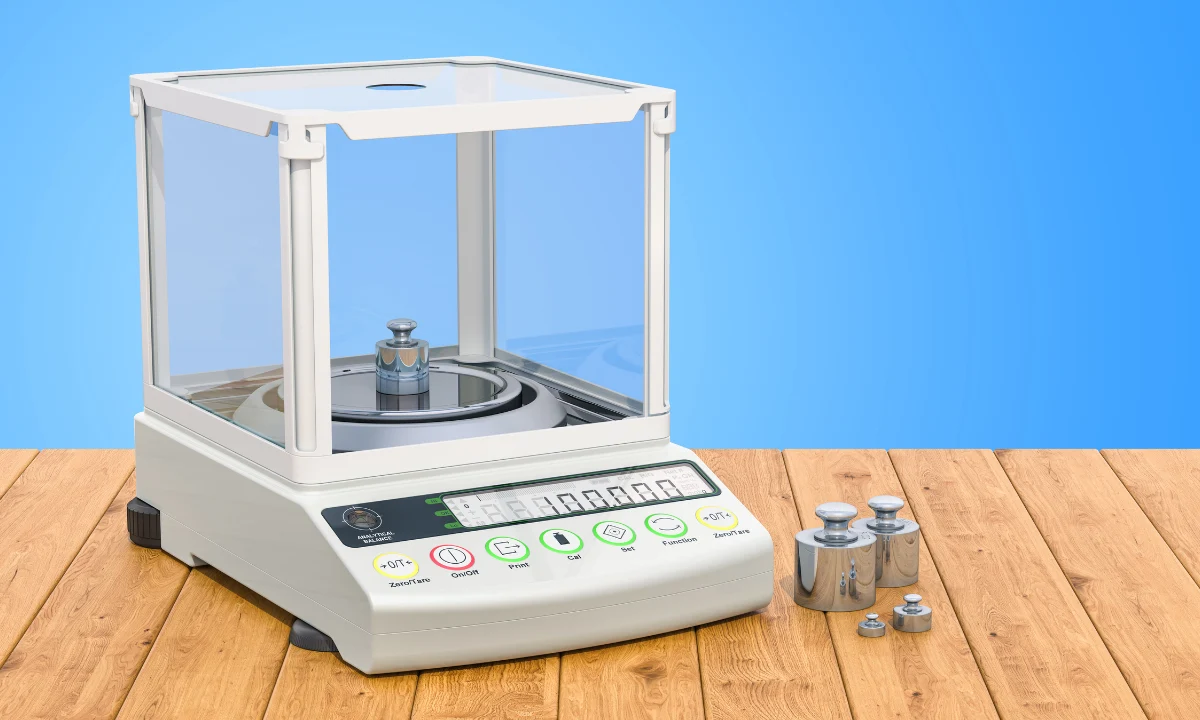
A scale can show a steady number and still give the wrong result. In a warehouse, that error may affect stock records and dispatch quantities. In a retail business, it may lead to incorrect customer charges. In manufacturing, even a small difference can change a batch, increase product waste, or create quality problems. Pressing the zero button or testing the scale with a random household object does not confirm that the full weighing range is accurate.
To calibrate a scale correctly, first clean, level, inspect, and stabilise it. Test its current performance with suitable reference weights, compare the readings with the correct acceptance limit, and adjust the scale only when the test results show that adjustment is needed. After adjustment, repeat the tests at several load points and record the final results. Scales used for trade, large industrial weighing systems, and equipment requiring formal calibration reports should be handled by trained personnel.
What Does It Mean to Calibrate a Scale?
Calibration checks the relationship between a scale’s displayed values and known reference values under stated conditions. In simple terms, a known weight is applied to the scale, the displayed result is recorded, and the difference is calculated. Calibration does not automatically mean that the scale’s settings will be changed. If the test results are already within the required acceptance limit, no adjustment may be needed. If the error is too large, the scale may require adjustment, repair, or further testing. The International Vocabulary of Metrology treats calibration and adjustment as separate operations. Calibration provides performance information, while adjustment changes the measuring system so that it gives the required indications.
Calibration, Adjustment, Zeroing, and Verification
These terms are often used as though they mean the same thing, but each one has a different purpose. Understanding the difference helps a business request the correct service and prevents operators from changing settings unnecessarily.
| Term | Practical meaning |
| Accuracy check | A basic comparison used to see whether a reading appears reasonable |
| Calibration | Comparing and recording scale readings against known reference values |
| Adjustment | Changing the scale’s response to reduce an identified error |
| Zeroing | Setting the no-load display to zero |
| Verification | Confirming that an eligible instrument meets specified requirements, including legal requirements where applicable |
Pressing the zero key does not calibrate a scale because it checks only the starting point. It does not show how the scale performs after a load is added. In the same way, an accurate result at one load does not prove that the scale is accurate across its full working range. Verification is also separate from normal calibration. It confirms that specified performance or legal requirements have been met.
What You Need Before Calibrating a Scale
Good calibration depends on preparation. Using the wrong weight, working on an unstable surface, or following instructions for a different indicator can produce a result that looks convincing but cannot be trusted. Before starting, identify the scale, read the manufacturer’s procedure, prepare suitable reference weights, and make sure the operating conditions are stable.
The Scale Manual and Model Information
Calibration menus differ between scale models. One indicator may use a keypad code, while another may use a service switch, internal menu, software connection, or protected setting. A universal button sequence should never be applied to every digital scale.
Before entering any calibration menu, confirm:
- The make and model
- The serial or asset number
- Maximum capacity
- Display division or readability
- Required calibration weight
- Recommended warm-up period
- Available calibration method
- Whether the scale has protected settings
- Whether a verification seal is present
The maximum capacity is normally shown on the data plate. The display division is the smallest value the scale shows. For example, a platform scale may have a capacity of 300 kg and display weight in 0.1 kg divisions. Always use the procedure for the exact model. Changing an incorrect parameter can affect capacity, decimal position, weighing units, zero tracking, or span response.
Suitable Reference Weights
Reference weights should have known values and be suitable for the scale being tested. Their required class, size, quantity, and accuracy depend on the scale’s capacity, readability, test procedure, and acceptance limit.
A suitable weight should be:
- Clearly identified
- Clean and undamaged
- Stable and safe to handle
- Suitable for the scale’s working range
- Supported by appropriate calibration information where records are required
- Stored in a way that protects it from corrosion, dirt, and damage
OIML R 111 provides technical requirements for weight classes and weights used in applications such as testing and calibrating weighing instruments. Scales4U supplies calibration weights for laboratory and industrial weighing applications, including weights manufactured to recognised OIML and ASTM standards. Do not assume that every scale must be calibrated using a weight equal to its maximum capacity. The correct load depends on the manufacturer’s instructions, the range used by the business, and the required calibration procedure.
Stable Operating Conditions
The scale must be tested under conditions that allow it to give a stable result. Environmental or installation problems can create an apparent calibration error even when the electronic settings are correct.
Before testing, control the following conditions as far as reasonably possible:
- Use a firm, level surface.
- Keep the scale away from vibration.
- Avoid strong airflow around precision balances.
- Allow the temperature to stabilise.
- Remove dust and product waste.
- Make sure the platform is not touching nearby objects.
- Use a stable power supply.
- Allow the scale to complete its warm-up period.
- Keep reference weights at a stable temperature.
Laboratory balances may react to airflow, static electricity, body heat, and small temperature changes. Industrial floor scales are less sensitive to airflow but may be affected by platform restrictions, loose mounting parts, damaged cables, or debris in the scale pit.
Check the Scale Before You Calibrate It
Calibration cannot repair physical damage. If a load cell is damaged, a cable is crushed, or the platform is pressing against a fixed object, changing the span setting may hide the problem temporarily without correcting its cause. A visual and operational inspection should therefore be completed before any calibration setting is changed.
Complete a Visual and Operational Inspection
Begin with the scale empty and switched off where safe to do so. Inspect the parts that can be checked without opening sealed or protected equipment.
Use the following checklist:
- Remove all products, pallets, trays, and containers.
- Clean the weighing platform or pan.
- Check that the scale is level.
- Confirm that all feet and supports are stable.
- Make sure the platform is not touching a wall, ramp, pit edge, or nearby machine.
- Remove stones, packaging, dirt, and product waste from underneath.
- Inspect visible cables for cuts, crushing, loose plugs, or exposed wires.
- Check the battery, plug, charger, and power supply.
- Confirm that the correct weighing unit is selected.
- Look for bending, cracking, corrosion, or impact damage.
- Check that the platform moves freely where movement is part of its design.
- Confirm that the test load is within the scale’s capacity.
After the inspection, switch the scale on and allow it to stabilise. The empty display should settle at zero. If it does not, use the normal zero function only after confirming that nothing is pressing on the platform.
Stop If the Scale Shows Signs of Damage
Do not continue into calibration mode if the scale shows signs of a fault that requires repair.
Stop the process if:
- The display changes continuously with no load.
- The platform is bent or does not move freely.
- A cable is cut, crushed, or wet.
- Moisture has entered the indicator or junction box.
- The frame or supports are cracked.
- The scale displays an unresolved error code.
- The scale has recently been overloaded.
- The scale was struck by a forklift, trolley, vehicle, or heavy product.
- Different platform corners give widely different readings.
- The reading does not respond normally when weight is added.
These symptoms may be caused by load-cell damage, platform binding, damaged wiring, unstable power, corrosion, or failing electronics. Calibration should follow repair, rather than being used as a substitute for repair. Scales4U provides onsite and workshop maintenance and repair services for most makes and models and carries a range of spare parts.
How to Calibrate a Scale Step by Step
The exact menu steps depend on the scale model, but the correct order remains similar: identify the required performance, inspect the equipment, record its current readings, adjust only when needed, and test it again. The following procedure is suitable as a general business guide. It does not replace the manufacturer’s instructions or an authorised legal-verification procedure.
Step 1: Confirm the Working Range and Acceptance Limit
Before applying a reference weight, decide what part of the scale’s range must be tested and what result will be considered acceptable.
These terms are important:
- Maximum capacity: The highest load the scale is rated to weigh.
- Working range: The part of the range normally used in daily work.
- Readability: The smallest displayed increment.
- Test point: A load selected for testing performance.
- Acceptance limit: The maximum error allowed for the application.
For example, a 1,500 kg platform scale may normally weigh loads between 100 kg and 900 kg. Its calibration plan should still follow the applicable procedure, but the normal operating range should be considered when selecting useful test points.
Do not use one general percentage as the allowed error for every scale. The correct limit may come from:
- Manufacturer specifications
- Internal quality procedures
- Customer requirements
- Contract requirements
- An applicable standard
- The process tolerance
- Legal-metrology rules where relevant
A scale may be suitable for stock control but unsuitable for a process requiring much tighter measurement limits. Acceptance must always be linked to the scale’s intended use.
Step 2: Prepare and Stabilise the Scale
Once the scale passes its initial inspection, prepare it for testing.
Follow these steps:
- Clean the platform or weighing pan.
- Place or confirm the scale on a stable surface.
- Level it using the built-in level indicator where provided.
- Connect it to a stable power source.
- Switch it on.
- Allow the manufacturer’s warm-up period.
- Select the correct weighing unit.
- Make sure no tare value is active unless required.
- Confirm that the unloaded display settles at zero.
- Place the reference weights nearby so they can reach a stable temperature.
Do not rush the warm-up period. Electronic components and load cells may require time to reach stable operating conditions, especially after being moved from a cold vehicle into a warm room.
Step 3: Record the Scale’s Current Performance
Before changing any setting, record how the scale currently performs. Businesses can begin with several practical tests for checking whether a weighing scale is correct, including zero, repeatability, known-weight, and stability checks. These are often called the as-found results because they show the condition in which the scale was found.
Use this general process:
- Confirm that the empty scale reads zero.
- Apply the first reference weight gently in the normal loading position.
- Wait for the reading to stabilise.
- Record the reference value.
- Record the scale indication.
- Remove the weight carefully.
- Check whether the display returns to zero.
- Repeat the process at the other selected load points.
A basic record may look like this:
| Test point | Reference value | Scale reading | Reading error |
| Low load | 10.000 kg | 10.010 kg | +0.010 kg |
| Middle load | 20.000 kg | 20.020 kg | +0.020 kg |
| Higher load | 30.000 kg | 30.040 kg | +0.040 kg |
Recording the original condition is important. If the settings are changed immediately, the business loses evidence showing how far the scale had drifted and whether the error increased across the range.
Step 4: Calculate and Review the Reading Error
The reading error is the difference between the value displayed by the scale and the value represented by the reference weight.
Use this formula:
Reading error = displayed reading − reference value
For example:
- Reference value: 20.000 kg
- Displayed reading: 20.020 kg
- Reading error: +0.020 kg
A positive result means the scale is reading high. A negative result means it is reading low. The error should then be compared with the correct acceptance limit. Do not decide that a scale has failed simply because the display does not match every decimal place on the reference value. The scale’s readability, uncertainty of the reference, intended use, and applicable limit must be considered. If all test results are within the required limits, adjustment may not be needed.
Step 5: Adjust the Scale Only If Required
Adjustment should be considered only after the as-found results have been reviewed. A stable scale that meets the required tolerance should not be adjusted simply because the calibration menu is available.
Depending on the model, calibration access may use:
- A keypad command
- A protected access code
- A physical service switch
- An internal jumper
- Manufacturer software
- An internal adjustment function
Follow the manufacturer’s procedure exactly. Do not guess the access code or copy a sequence from a different scale model. Do not break a verification seal, open protected equipment, or change controlled settings unless you have the proper authority. Unauthorised changes may affect the legal status of a scale used for trade.
Step 6: Complete Zero and Span Adjustment
Many digital scales use zero and span stages during adjustment.
Zero adjustment establishes the no-load reference.
Span adjustment uses a specified reference weight to set the scale’s response under load.
A general procedure is:
- Remove all weight from the platform.
- Wait for the empty reading to stabilise.
- Confirm the zero stage when instructed.
- Place the specified reference weight in the centre.
- Allow the indication to stabilise.
- Enter or confirm the correct reference value.
- Save the result.
- Remove the weight carefully.
- Exit the menu according to the manual.
- Allow the scale to return to normal weighing mode.
Some scales use more than one reference load. This is often called multi-point or linear adjustment. It can help set the scale’s response at several points rather than relying on one span value. Do not use a heavier or lighter weight simply because it is available. The indicator may require a specific value or an allowable range.
Step 7: Test More Than One Load Point
One correct result does not prove that the scale is accurate at other loads. A scale may display 20 kg correctly but show unacceptable error at 5 kg or 40 kg.
After adjustment, test the scale at several points across the range used by the business. Where suitable, include:
- A lower working point
- A middle working point
- A higher working point
- Additional points required by the procedure
Weights may also be added in increasing order and then removed in decreasing order. This can show whether the scale behaves differently as the load increases and decreases. OIML guidance for non-automatic weighing instruments includes weighing, eccentricity, and repeatability among the important performance tests.
Step 8: Test Repeatability and Zero Return
Repeatability shows whether the scale gives similar readings when the same unchanged load is applied several times under the same conditions.
Use this method:
- Confirm that the empty scale reads zero.
- Place the same reference load in the same position.
- Wait for a stable result.
- Record the reading.
- Remove the load.
- Check that the display returns to zero.
- Repeat the process several times.
- Compare the recorded readings.
A typical record may look like this:
| Test | Reference load | Displayed reading | Returned to zero? |
| 1 | 20.000 kg | 20.000 kg | Yes |
| 2 | 20.000 kg | 20.010 kg | Yes |
| 3 | 20.000 kg | 20.000 kg | Yes |
The readings should remain within the required repeatability limit. Large differences may point to vibration, loose parts, platform restrictions, wiring faults, moisture, or load-cell problems. Repeatedly changing the span setting will not correct a mechanical problem that causes poor repeatability.
Step 9: Check Different Platform Positions
A corner-load test checks whether the result changes when the same weight is placed at different positions on the platform. It may also be called an eccentric-load test.
Use the following general process:
- Place the reference weight in the centre.
- Record the reading.
- Move the weight to the first defined corner or loading area.
- Record the result.
- Repeat at the remaining positions.
- Compare all readings with the centre result and applicable limit.
| Position | Reference load | Displayed reading |
| Centre | 20.000 kg | 20.000 kg |
| Front left | 20.000 kg | 20.010 kg |
| Front right | 20.000 kg | 20.000 kg |
| Rear left | 20.000 kg | 20.020 kg |
| Rear right | 20.000 kg | 20.010 kg |
A small difference may be normal within the applicable limit. A large difference can indicate:
- Platform binding
- Uneven load transfer
- Damaged mounting parts
- Platform deformation
- Junction-box imbalance
- Load-cell damage
- Poor installation
Do not open a junction box or attempt to balance individual load cells unless you are trained and authorised. Incorrect adjustment can make the overall performance worse.
Step 10: Record the Final Results
After adjustment, repeat the selected tests and record the final condition. These final measurements are commonly called as-left results because they show how the scale was left after the work.
The final record should include:
- Customer or business name
- Scale location
- Make and model
- Serial or asset number
- Maximum capacity
- Readability
- Calibration date
- Reference weights used
- Reference-weight identification
- Test points
- As-found readings
- Adjustment or repair completed
- As-left readings
- Required acceptance limits
- Pass or fail result
- Name of the person or technician
The as-left readings should not simply repeat the target values. They must reflect the actual readings observed after the adjustment. Scales4U provides onsite and in-house calibration services supported by calibration reports.
How Do You Know the Calibration Was Successful?
A successful calibration is supported by test results, not by the fact that the scale accepted a calibration weight or displayed a confirmation message. The scale should meet all requirements that apply to its intended use. In practical terms, it should return to zero, repeat the same reading, perform acceptably across the working range, and remain consistent when a load is moved to different approved positions.
| Test | What it confirms |
| Zero-return test | The scale returns to zero after the load is removed |
| Repeatability test | The same load produces consistent readings |
| Multi-point test | Performance remains acceptable across the tested range |
| Corner-load test | Load position does not create excessive error |
| Increasing and decreasing load test | Results remain acceptable as weight is added and removed |
| Stability check | The indication settles and remains steady |
Calibration may be considered successful when:
- The empty scale returns to zero.
- Repeat readings are consistent.
- Errors are within the correct acceptance limits.
- Performance remains acceptable at each required load point.
- Different loading positions do not create unacceptable differences.
- The display stabilises normally.
- No unresolved physical or electrical fault remains.
- The results have been recorded.
A scale should not be declared accurate merely because it matches one reference weight exactly. Accuracy must be considered over the part of the range that matters to the user.
When Should Calibration Be Left to a Professional?
Basic checks can be completed by trained operators, but some calibration work requires specialist equipment, technical access, safe loading procedures, or legal authority. The decision between internal and external scale calibration depends on the instrument, required documentation, available reference standards, staff competence, and how critical the measurement is to the business.
Arrange professional calibration when:
- The scale is used to determine a buying or selling price.
- A protected setting or verification seal is present.
- A formal calibration report or certificate is required.
- The weighing system uses several load cells.
- Corner readings differ significantly.
- The scale has been overloaded or struck.
- A platform, cable, junction box, or load cell may be damaged.
- Suitable reference weights are unavailable.
- The required test loads cannot be handled safely.
- The scale is fixed into a pit, hopper, tank, or production line.
- Calibration repeatedly fails.
- The result affects health, safety, contractual acceptance, or critical product quality.
Large industrial scales may require several tonnes of test load, substitution methods, material tests, lifting equipment, or electronic diagnostic tools. Testing such equipment without a safe plan can injure workers or damage the scale. Scales4U offers onsite and workshop calibration for South African businesses and provides a calibration report after the service. Onsite calibration is useful for floor scales, industrial platforms, and other equipment that should not be transported unnecessarily.
Calibration and Legal Verification in South Africa
Calibration and legal verification answer different questions. Calibration asks how the scale performs against reference values. Verification asks whether an eligible scale meets the legal requirements that apply to its prescribed use. The South African Legal Metrology Act provides for legal metrology technical regulations intended to support fair trade and protect public health, safety, and the environment.
A business may need to consider verification where weight is used to determine:
- A selling price
- A buying price
- Customer payment
- Commercial quantity
- The quantity supplied in a regulated transaction
Not every scale owned by a business automatically requires legal verification. The requirement depends on the instrument, its approval status, the way it is used, and the applicable legal rules.
Can You Calibrate a Trade Scale Yourself?
An operator may perform normal external checks, such as inspecting the platform, confirming zero, and comparing readings with a suitable check weight. However, an operator should not break a verification seal or alter protected settings without proper authority. Where a scale is used for prescribed trade purposes, adjustment or repair may need to be followed by the correct legal-verification process. Calibration alone does not automatically provide legal-for-trade status. Scales4U explains that its verification service applies to trade-approved scales and balances used for trade, while its calibration service assesses and records measurement performance.
When Should You Calibrate the Scale Again?
There is no single calibration interval that suits every scale. A scale weighing low-risk internal stock once a week does not face the same conditions as a production scale operating continuously in a wet or dusty environment.
The calibration schedule should consider:
- Manufacturer guidance
- Number of weighing cycles
- Operating environment
- Required tolerance
- Consequences of an incorrect result
- Previous calibration results
- History of drift
- Customer requirements
- Quality-system requirements
- Legal requirements where applicable
Calibration or a formal performance check may also be needed after:
- Installation
- Relocation
- Repair
- Adjustment
- Load-cell replacement
- Indicator replacement
- Overloading
- Heavy impact
- A failed routine check
- Long-term storage
- A large temperature or environmental change
- An unexplained stock or production difference
Businesses should use scheduled check weights between professional calibrations. A routine check can identify drift early, but it does not automatically replace a documented calibration. Businesses with several scales can use a planned maintenance agreement to schedule inspections, calibration, and repair work. Scales4U offers service-level agreements ranging from one to twelve visits per year according to the customer’s requirements.
Accurate Calibration Starts With Correct Testing
How do you calibrate a scale correctly? Start by identifying the exact scale, checking its condition, preparing suitable reference weights, and creating stable operating conditions. Record the scale’s performance before changing anything, compare its error with the correct acceptance limit, and adjust it only according to the manufacturer’s procedure. After adjustment, test multiple load points, repeatability, zero return, and different loading positions before recording the final results.
Do not use calibration to hide structural, electrical, or load-cell damage. Trade scales, large industrial systems, and equipment requiring formal records should be handled by qualified personnel. Scales4U provides onsite calibration, maintenance, repairs, calibration reports, legal verification, calibration weights, and planned service agreements for businesses across South Africa. A professional assessment can confirm whether your equipment needs calibration, adjustment, repair, or verification.